Saturday, February 28, 2009

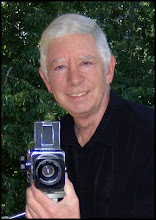
About Hub's Photographic Picks

Reviews of photo equipment flourish on the Internet. Many of these review sites like dpreview.com are worth their weight in gold when it comes to evaluating the technical merits and advancements incorporated in new products. Credible web sites like dpreview.com provide invaluable insights whenever an equipment purchase is being researched. I use them myself. Others cause me to scratch my head and ask, "Does this writer know anything about photography?" (One dead give-away of questionable camera review sites that I continue to spot throughout the Internet are those that use the 100-year old photographic term shutter and spell the word s-h-u-d-d-e-r. It just makes me shudder.)

The occasional recommendations that I make in Hub's Photo Tips and Picks will be based on their general applicability, usability, durability and value to the beginning DSLR users. I will recommend only products that I have used personally and found to provide the "best bang for the buck".

Along the way, I will recommend books, articles, websites and other source materials that I have found to be insightful and educational on all things related to beginning DSLR photography.

So, no I won't be starting with the Canon EOS 5D Mark II or the Nikon D3X. Those "dream machines" are not within my average reader's budget and will remain "cameras to aspire to". Instead, I will be reviewing products that I believe are of the greatest value to those who want solid, dependable equipment that will enhance their photographic experience and NOT require a second mortgage to own.

My "Picks" begin with the next article. I will focus on the most misunderstood and neglected piece of equipment any serious beginning photographer must purchase -- the tripod. I'll review the requirements of a good tripod and one tripod, in particular, that I recently tested and found definitely met the challenge.

Since I will only suggest equipment, software, books and materials that I believe are worth your investment, there is no grading system -- like "4 stars" or "thumbs up/thumbs down." If I didn't think it was worth your time to consider, I wouldn't have wasted my time writing about it.

I hope you enjoy my "Picks" and that each one will add to your enjoyment of photography.


Powered by ScribeFire.

Tuesday, February 24, 2009

Frame Your Picture In The Camera

There is a simple, professional photographic trick that when used correctly will immediately add depth and interest to your pictures. The technique is called framing. Unlike the frame you buy at an art store, these frames are provided free by nature and man-made structures that are in your scene.


The dark foreground tree becomes a framing element to add depth to this Zion Park scene.

By placing a naturally occurring picture element to the front and near the borders of your composition, a natural frame is created. The close proximity of this framing element to the front of the picture also increases the perceived distance between the foreground and background of the image.


This Las Vegas Eiffel Tower is framed by the hotel arch.

The technique requires that you thoroughly investigate your subject from every angle to find framing elements that compliment your composition.


In the Rose Garden image above, the flowered archway presents a natural frame and entrance into the formal garden. Being darker than the rest of the image, the archway adds depth and provides a path for the eye to enter the picture.


Oregon Coast

This Oregon Coast line is framed by a native evergreen tree to add interest and emphasize the infinite ocean and sky seen in this picture.


TransAmerica Pyramid

The overhanging roof of a small San Francisco shop provides a natural frame that emphasizes the height of the TransAmerica tower and guides the viewer's eye to the subject.

REMEMBER: To have the framing element in focus as well as the rest of the picture, a large amount of depth of field is required (smaller aperture opening).


Use this simple framing technique to add another element of interest, professionalism and depth to your pictures. Nothing tricky here. Just a willingness to train your eye to see the framing possibilities surrounding your subjects. Like everything else in photography, it's mostly a matter of practice, practice, practice.

Thursday, January 22, 2009

Camera Tip - Does your camera need glasses?

Probably not. But your camera may need adjusting to "see" as you "see".

Unfortunately, not everyone has 20/20 vision. As a matter of fact, most eyes have their own unique focusing characteristics. If your DSLR isn't adjusted to the focusing capability of your eyes, less than sharp images will likely result. For regular eyeglass wearers or those requiring reading glasses, you already know that there is probably a difference between your eyes and standard factory viewfinder settings. This eye-versus-camera vision discrepancy even comes into play when you rely on autofocus mode.

There is a simple solution built in to most DSLRs -- a solution and adjustment that should be checked frequently.


Diopter adjustment control on a Nikon D200

A small, and often overlooked control, located next to your camera's viewfinder is capable of adjusting the diopter within the camera. This simple control plays a critical role in adjusting the camera's viewfinder to your eye's characteristics. Making the diopter adjustment is easy and quick:

1. Find a large piece of plain cardboard. Any light color will do. OR find a well-lit blank wall.
2. Turn OFF your camera's autofocus. Use manual focus. Set the lens focusing ring to infinity. We want the lens to be WAY out of focus.
3. Point your camera's lens at the cardboard or blank wall. Get close enough to the cardboard or wall to completely fill your viewfinder. Don't focus on the cardboard. Leave the focus set at infinity.
4. Look through the viewfinder and (in the case of this Nikon camera) you will see eleven small boxes in the viewfinder. Other cameras may use a different focus target scheme, but you will quickly see these targets when you look through the viewfinder:


The focus target boxes as initially seen in my Nikon camera

Shown above are the boxes I saw through my viewfinder as I started my diopter adjustment. Notice that the boxes are soft or out of focus.

5. Turn the camera's diopter adjustment in either direction until the boxes become very sharp (in focus). If the boxes become even more out of focus, turn the knob in the opposite direction. Eventually you will find a knob position where the boxes are sharp.


Turning the diopter adjustment brings the target boxes into focus.

6. That's it! Your camera's viewfinder is now customized to your eye.

Once the boxes are sharp, your viewfinder is adjusted to your specific vision. I suggest you check this adjustment occasionally because it is possible for the diopter control knob to be accidentally moved during normal camera handling. Since the process only takes seconds and can be done anywhere, it's well worth the time invested.

This adjustment has NO impact on the automatic focusing feature of your camera which will continue to work as before. The danger in not adjusting the viewfinder to your vision is that you may think the autofocus mechanism has incorrectly focused your camera causing you to incorrectly override the suggested focus setting. Or the camera may have selected the wrong object as its focus point, and you may not be able to "see" this inaccuracy and make the necessary correction.

Even if you have perfect vision, there is always the chance that the diopter control knob has moved during normal camera use (e.g., while taking the camera in and out of the camera bag, while changing other camera dial settings, etc.) It's best to synchronize all these visual picture taking components -- your eye, the camera's viewfinder and the autofocus system. And you do this with the diopter adjustment control knob.

On occasion, I have wanted to check my diopter setting in the field. Since I don't normally carry a large cardboard or blank wall into the field, I substitute the sky. This works very well.

If you have questions or comments, just let me know.

Tuesday, January 13, 2009

Photography Tip - Rain Drops on Flowers

Because my wife is an avid gardener, I often go with her to local flower shows. That's one of the perks for those living in the Portland, Oregon area -- plenty of spectacular flower shows. Taking pictures of flowers soon gives way to experimentation into better and more creative ways of photographically capturing nature's never ending varieties.

I soon discovered that my most appealing pictures were of the flowers I took early in the morning -- just after the flower beds had been watered. Those dew-drop size water droplets gave my images more "pop" and interest.


Straight, no frills flower picture

The flower in the picture above was taken on my desktop studio. It catches the eye and is sharp enough to show every detail. However, to me, it looks like a typical flower picture. This is where my experimentation began.


Same flower after the rains

But it's the look of this second picture that I find more appealing. The rain drops add more interest to the picture to hold the viewer's attention.

So is there a simple technique for achieving the same results in the field?

I tried several approaches:
  • Indian rain dances to provoke the gods and initiate a small rain shower
  • Seeding the clouds over the flower fields to entice a brief moment of rain
  • Stealing the gardener's hose -- which was never long enough.
I finally came upon a simple solution that I now carry with me every time I go into the field.


Used, nasal spray bottle

That's my secret, portable rain shower. I found that a used and cleaned nasal spray bottle has all the benefits of Mother Nature without the uncertainty. The bottle is only 3 inches high by 2 inches wide. It holds about 2 ounces of water and is leak-proof. Best of all it produces a fine mist of water that is controllable and exactly mimics rain or heavy dew. It fits neatly in my pocket or camera bag and is always close at hand. And no one has ever been concerned when I spray a mist of water on their flowers.


Adding rain drops in the field

I close this tip with the picture above. I took this picture while at a flower show using my water-loaded, nasal spray bottle. The technique gives flowers that extra little spark of interest that intrigues the viewer.

I hope this tip comes in handy for you as well.

Sunday, December 7, 2008

Shooting Tip - Christmas Light Displays

Seems to be a good time for a seasonal photography tip. Millions of pictures will be taken this holiday season to memorialize the creative light displays of dedicated (and occasionally fanatical) artists of the Christmas bulb. Situations like these often result in disappointing pictures due to the unusual light conditions.

My list of equipment and settings for this discussion includes:
  • Tripod: to stabilize camera during long exposures
  • ISO: 100 to minimize digital noise and maximize image detail
  • Shooting Mode: Aperture priority to control depth of field.


Lighting display pictures present some interesting photographic problems.

The picture above is typical of the results in these unique lighting environments. Although the scene has been captured, the highlights have been overexposed and contain no details. The result is the visual "fusing" together of the individual lights that make up the display.


Individual lights are indistinguishable and detail is lost
(ISO 100, 4 seconds, f/8, aperture priority mode)

The picture above is an enlarged section of the first image. Notice the lights that provide the detail in Santa and the snowman have merged to produce an over-exposed mass of white.

The metering problem is created by the amount of dark area in the scene and the extreme intensity of the display lights (the scene's high dynamic range). The camera's metering is attempting to provide an exposure setting that will produce an overall exposure value that is equivalent to 18% gray. In most cases, the amount of dark area is greater than the light areas and has the greatest influence on the camera's metering system. As a result, the camera determines settings that over-expose the display lights.

The goal should be to distinguish the individual lights that make up the scene.


Exposing for the lights reveals the details in the display
(ISO 100, 1 second, f/8, aperture priority mode, -2 stops of exposure compensation applied)

The picture above has been exposed for the display lights. Notice that the individual lights and their colors are now distinguishable. The strings of lights have also provided enough illumination to allow some of the house details to be seen and add structure to the image.


Close up of properly exposed Santa and Frosty
(ISO 100, 1 second, f/8, aperture priority mode, -2 stops of exposure compensation applied)

Now the individual lights and their colors are visible to give the image the details in the displays and colors of the season. I elected to intentionally under-expose the image by 2 stops using the camera's exposure compensation control. How did I settle on 2 stops?

I used a combination of camera feedback:
  • The camera's preview screen. Watching the preview image I was able to see the results of each trial exposure and "see" the impact of exposure compensation changes. I was looking for the setting where the individual display lights became recognizable.
  • The camera's histogram. By watching my preview image and ensuring that the curves were not pushed too far to the right border of the histogram.
Here are two more examples from the house next door:


Again, the individual lights are indistinguishable and detail is lost
(ISO 100, 4 seconds, f/8, aperture priority mode)


Exposing for the lights reveals the details in the display
(ISO 100, 1 second, f/8, aperture priority mode, -2 stops of exposure compensation applied)

Notice anything? The exposures for this example are exactly the same as the first example. The point is that there is much similarity between displays. The exposure settings determined for one display become an excellent starting point for others.

A couple of final thoughts:
  • There are many ways of taking these lighting display pictures. Other photographers might have elected to use a high ISO setting (in the range of 1,000 to 1,600 for example). This is a very workable suggestion when you don't have the luxury of using a tripod and must hand-hold your camera. These higher ISO settings will provide faster shutter speeds. At the same time, just be aware that "noise" will become more apparent as the ISO values increase.
  • Snow is your friend. Unfortunately, in my area of the country, snow seldom falls during the holiday season. If you are lucky enough to shoot holiday displays with snow on the ground, you will be the beneficiary of additional fill light that is being reflected from the snow. This provides more structure to the picture and, obviously, more of the appropriate holiday mood.
  • It is possible to go overboard in the quest to make the individual lights distinguishable. I prefer to find an exposure that still provides some detail in the house and/or landscape to give the picture more structure. The picture below suffers from too much compensation and a lack of structure:

Over compensating for the lights reveals the details in the display but loses the structure provided by the house.
(ISO 100, 1 second, f/8, aperture priority mode, -3 stops of exposure compensation applied)

I hope this short discussion helps make your holiday pictures more successful and enjoyable.

Happy holidays from Hub's family to yours.