Showing posts with label tripod. Show all posts

Saturday, September 19, 2009

I Bought The Camera. What next?, Hub's Ideas


Possibly the second most frequently asked question by the beginning photographer (after "Which camera should I buy?") is, "What accessories should I purchase next?" There's no correct answer to this question. Much of a photographer's secondary equipment is determined by his/her photographic specialty, preferences and shooting style. However, that doesn't stop Hub from publishing a recommended "what next" list for those new to photography.

Some attempt has been made to prioritize this list, but undoubtedly there will be those who would shuffle the order -- or offer other suggestions. That's OK. This should get you started.

The list assumes you have this basic DSLR equipment: a camera with a built-in flash, lens and a data card.

  • A "Dummy's" book for your camera. The camera manufacturer's manual is always my first source for answering questions about my camera. But I've found that buying an independent author's book about my camera usually facilitates learning. These books seem to be written in a more photographer-friendly style that complements the manufacturer's manual and are organized in the same way I'm accustomed to learning. A "how to" book for nearly every popular camera model seems to pop up in book stores and camera shops about the same time as the camera is released to the public. This type of book is an inexpensive learning tool when you're just getting started. Store this book in the next recommended item so it's always handy.
  • Camera bag. You've got to have some safe place to put everything, and an easy way to lug it all around. Currently, at least in the Pacific Northwest, camera backpacks seem to be hot. I wasn't on the backpack band wagon until recently. I find they are convenient, comfortable, water resistant and do a good job of protecting your photographic investment.
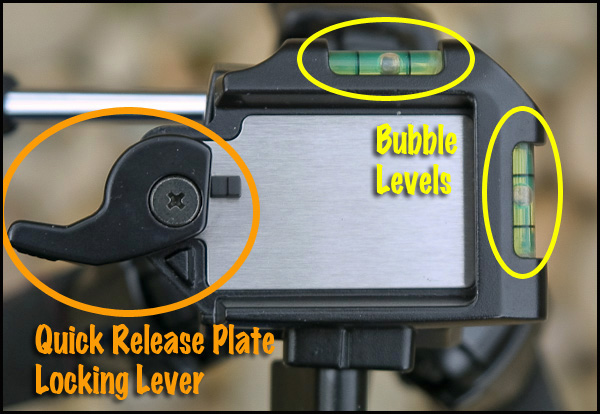
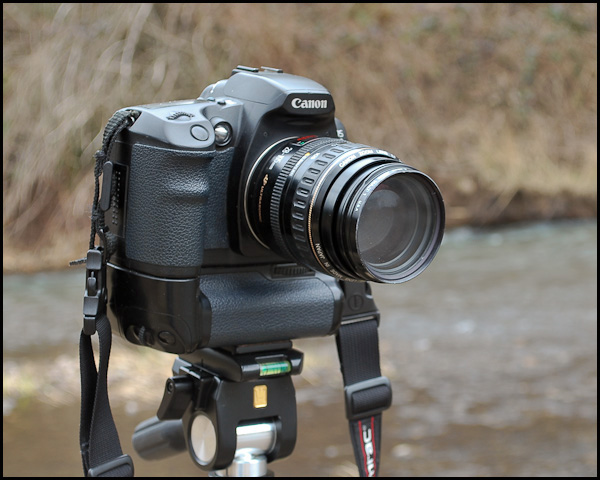
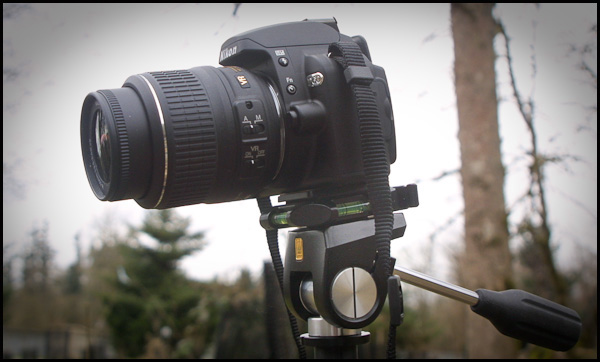
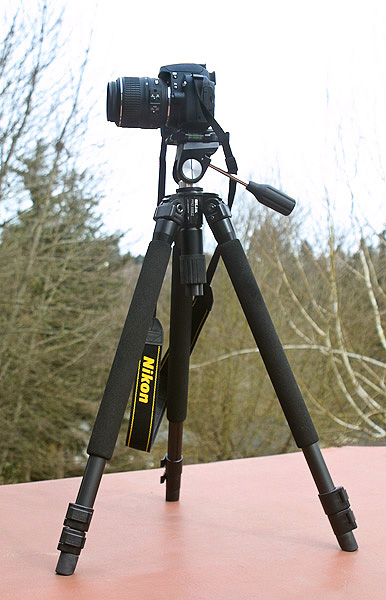
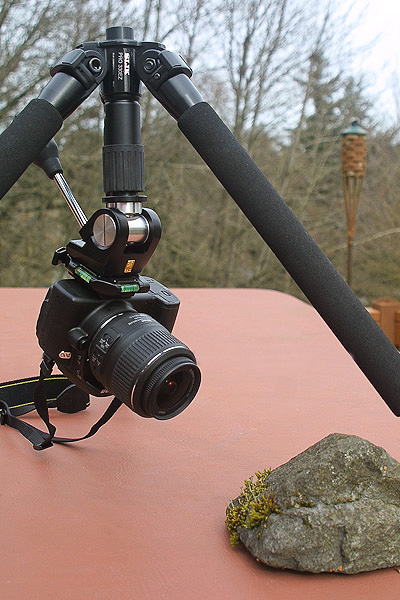
  • Tripod. A tripod comes in a close second to the camera bag. Although the thought of toting a tripod along may seem "geeky" or cumbersome, you'll soon learn to love this indispensable picture-taking platform for the sharpness it adds to your images and the time it gives you to compose your pictures. Lightweight and sturdy tripods are available to make carrying this accessory manageable.
  • Cable release. This can be a fixed-wire cable release that screws into your camera's accessory socket or a wireless release that frees you to move farther away from your camera. Using a cable release when your camera is mounted on a tripod eliminates camera shake that's caused when you press the shutter release button.
  • Extra battery. Don't miss that once-in-a-lifetime shot at 5:00 p.m. because you've been shooting since 6 a.m. Carry a spare battery (or two).
  • Extra data cards. Ditto.
  • Lens cleaning brush or "bulb" blower to remove dust safely from the front and rear element of your lens(es) as well as the mirror in your camera body. Your camera's glass surfaces are dust and dirt magnets.
  • UV filter. Some will say that adding a filter to the front of your lens can be detrimental to the quality of your images. I prefer to play it safe with the front element of my lens and the coatings it contains by protecting it with a high quality UV filter (like Hoya or Tiffen). Accidental bumps and environmental contamination can result in real lens damage. A UV filter is much cheaper to replace. Any resulting degradation in quality will only be noticeable if you happen to own an electron microscope.
  • Polarizing filter. This is definitely not critical, but I always seem to be pulling this filter out of my camera bag. I use a polarizing filter for its intended purpose -- to reduce glare from reflective surfaces, to create dramatic dark blue skies and, more routinely, as a neutral density filter when I intentionally want to reduce the amount of light entering the camera to achieve longer shutter speeds in daylight conditions. (Great for flowing motion images of our area's world-class collection of waterfalls.)
  • Off-Camera Flash. When you get serious about improving your portrait, event and/or sports photography, an off-camera flash becomes necessary.

Don't think all these purchases have to be made immediately or at the same time. Cheap, bargain basement accessories can significantly impact image quality and hinder camera performance. (I can't tell you how many times I've seen a $20 tripod tip over with a $700+ camera attached.) Save up your money until you can afford to shop for high quality accessory items.

Sunday, March 1, 2009

Hub's Pick - The SLIK Pro 330EZ Tripod

One of the biggest mistakes a serious beginning photographer can make is to cut corners when purchasing a tripod. Tripods range in cost from about $20 to well over $1,000. The temptation to save money and buy a cheap tripod is understandable, but, in the long run, a waste of good money. Cheap tripods don't provide the stability, durability, camera safety and flexibility photography requires.

I have had my Gitzo tripod for more than 25 years. It has become a friend and my stable photography platform. During this time, I have learned to operate it with my eyes closed. The one problem with my tripod is weight. At about 12 pounds, my Gitzo provides a workout every time I go into the field.

For this reason, I would not recommend my tripod to beginning photographers. (Or to me as a field tripod for that matter.) The recent industry trend in tripods is lightweight and sturdy. To that end, many manufacturers have taken to producing ultra lightweight tripods based on carbon fiber technology. When I started this investigation, I was immediately hit with "sticker shock". They ain't cheap. Even smaller carbon fiber tripods start at $250 and if I needed a larger unit, it could eventually cost more than the camera it was made to support. (By the way $250 was just for the tripod. I would need to add a separate tripod head to have a functioning tripod. Add another $100 plus.)

This isn't the value I was hoping to bring to my readers. We don't require space-age, stealth technology that will outlive the pyramids. What we really need is a semi-light, flexible, extremely stable and affordable "take everywhere" tripod. Serious beginners want to take landscapes, portraits, still lifes, night shots, wildlife and be able to do some experimenting with techniques like HDR photography.

So, I decided to follow my own advice and talk to the people I trust most - my local professional camera dealer. In my case, that means a trip to Pro Photo Supply in Portland, Oregon. The pro I found waiting for me was Tom. I told him I was about to write an article for my readers on tripods, and that I needed his advice on a solid but budget-friendly option for serious beginning photographers.

There was no hesitation. Tom led me directly to the store's tripod display and handed me the SLIK Pro 330EZ tripod. The price was extremely reasonable. I have found this tripod priced between $105 and $120 (Manufacturer's suggested price is $179). Best of all, Tom let me take it for a working "test spin". So that's what I did for the next 10 days.


Opening the box, I was pleasantly surprised to find that everything came with the tripod. I didn't need to buy any accessories (as if a tripod head could realistically be called an accessory). The tripod ships with:
  • tripod (with soft-foam covered top legs)
  • a two-piece tripod column and pan/tilt head
  • two bubble levels incorporated
  • quick release camera mount
  • instructions
The Pro 330EZ is not made with carbon fiber, but the next best thing - super titanium alloy. This gives the little guy excellent strength and noticeably light weight.


The unit weighs in at 4.4 pounds (including the head) and when collapsed it's a mere 24 inches long. Doing some research I found that an equivalent carbon fiber tripod would only weigh an ounce or two less. Since I was concerned about saving pounds, an extra ounce didn't seem like too much of a sacrifice to save a couple of hundred dollars.


The included camera quick release device attaches to any standard camera tripod socket, making set up and tear down a snap.


With the release device attached, the camera slips onto the tripod mounting plate, snaps into place and is secured by the quick release locking lever shown above. From this angle you can also see the two bubble levels. Extremely handy when attempting to level the camera for horizons, panoramas or any vertical/horizontal elements in the composition.

With the camera mounted, how stable is the unit? I'm pleased to report that this tripod is extremely stable at all heights. I felt my camera was as secure and stable as it would be on my trusty old Gitzo. Even normal bumping of the tripod didn't cause it to tip or fall in any of the configurations I used.


With either size camera the bubble levels are clearly visible for fine adjustment

I used the Pro 330EZ with a Canon EOS (with extra battery compartment accessory) and a Nikon D60 (considerably smaller than the Canon). Both cameras were held securely and without any "top heavy" tendencies or vibrations. SLIK rates the tripod with an 8 pound load capacity. More than enough to safely support a camera and long telephoto lens.


Vertical pictures can be easily accommodated by loosening the platform locking knob and horizontally rotating the camera 90 degrees. Then use the tilt and pan handle to move the camera to the desired vertical position. Very quick.

But the real story behind the Pro 330EZ is the flexibility it provides the photographer.


Each tripod leg has two extension sections that are quickly released and positioned with quick snap leg locks. Fully extended (including the head column extended) the tripod is 48.4 inches high.


The quick release leg locks and smooth action of the leg segments make set up in even the most complex and rugged situations quick and easy. In this set up, the front leg was at full extension as was the center column. And the camera remained rock steady during the long exposures used to create flowing-water motion in the nearby stream.

But that's only the beginning.


At the joints where each leg connects to the center column support, three two-position leg locks allow the angle of the legs to be altered in 2 steps to allow the tripod to conform to unusual shooting situations or a lower camera for unique perspectives.


In the picture above, the leg locks were adjusted to the most extreme angle and the column was raised to allow a lower shooting angle.


Since the center column is made of two pieces (as shown above), one section can be removed to allow an even lower camera position.


In the above picture, the lower section of the center column has been removed to allow an extremely stable camera platform and low perspective. In this lowest position the top of the camera mounting plate is a mere 11 inches above the ground. Pretty cool.

Need to get even lower and closer?


Then reverse the column and lay on your stomach. It takes a while to get used to shooting "upside down", but -- as you know -- a good macro shot is well worth the effort.

Without a doubt, it's mass production that helps keep the cost down on the SLIK Pro 330EZ. But the solid build, fit & finish, smooth operation, flexibility and quick operation of this tripod shouts "professional". It may be considered the low end of the professional line, but don't tell the tripod. It acts just like its big brothers.

Its size and weight are a joy. It easily fits into a backpack or suitcase. Most importantly, a photographer can carry this tripod all day and never notice its 4.4 pounds.

So, my friend Tom at Pro Photo Supply had good reason to point me to the SLIK Pro 330EZ. This "everything's in the box", durable and infinitely flexible tripod is a winner.

As a matter of fact, it's now mine.

Powered by ScribeFire.

Tuesday, September 2, 2008

Equipment Tip - Shutter Release & Image Sharpness

A few posts ago, I touted the advantages of using a tripod whenever possible to increase the sharpness of your images. I briefly commented on using a shutter release cable to add to camera stability. Consider triggering the shutter even when the camera is mounted on a tripod. Even with the support offered by the tripod, camera shake can still occur -- especially with lower quality, inexpensive tripods. Here are three ways the shutter can be released when the camera is mounted on a tripod:
  1. Push the shutter button with your finger. Advantages: You never forget to take your trigger finger with you, and it doesn't cost anything. Cons: The action of pushing the button can shake or move the camera to impact the quality and sharpness of your picture.
  2. Use the camera's self-timer feature. (And you thought it was just for taking pictures of yourself.) Advantages: Again the feature is always there, and it came free with the camera. Cons: Takes some time to set up, and when you physically push the button to activate the self-timer the camera might move slightly.
  3. Use a wired or wireless shutter release. Advantages: Since the device is a switch that actuates your electronic shutter, it provides a truly motionless shutter button release and the sharpest alternative. Cons: The cost of purchasing the accessory.

The cost was prohibitive enough that it wasn't until recently that I made the investment. (Up to this time I had been using the camera's self-timer exclusively.) The shutter release cables made by my camera manufacturer were expensive and were never on sale.

Then I saw an ad on Pro Camera Gear's website for a wired and wireless remote made by a company called Micnova. The wired model was selling for $12.99 and the wireless remote version was priced at $29.95. That's over 60% less than I had thought I was going to spend. Being a wild and crazy guy (as well as never knowing when I might need the wireless feature to safely capture Sasquatch in the mountains of Washington), I purchased the wireless remote.


The Micnova wireless remote consists of two units:
1) the receiver and 2) the transmitter.

The wireless remote came with batteries and just needed to be attached to the front connector of my Nikon D200. Bingo. Ready to take pictures.

The unit can be user set to any of 16 channels to avoid interference with the other Sports Illustrated photographers at the Super Bowl game. The button on the transmitter works just like the button on my camera's body. Push the button part way down to activate the meter and auto-focus, and then press the button the rest of the way down to trigger the shutter.

So, here's a way of getting the advantages of a shutter release cable when taking tripod mounted pictures without spending too much money. Best of all, you don't have to worry about accidentally leaving a finger at home. In actual shooting conditions, I've been as far away as 30 feet from the camera, and the shutter has functioned without a hiccup. Both the wired and remote versions are available for most popular DSLRs.

Hope this is helpful. If you have comments or questions, you know where to find me.