


Part 1 in this series, explained the importance of “depth of field” in conveying a sense of three dimensions in a photograph. The next three tips are useful when taking pictures with great depth of field – like landscapes. In these images, using shallow depth of field is not an option, because of the necessity to have as much of the scene in focus as possible.
So how does our eye/brain interpret distance in scenes with extreme depth of field?
The technique suggested in this tip is based on the visual phenomena called “convergence of lines”. Lines that our eye/brain recognize as being parallel in reality, but visually merge at a vanishing point within a picture, provide us with the critical cue that distance is present, and that the scene does not exist on a single flat plane.
Pictured above is the classic “train tracks disappearing into the horizon” image. We don’t need to be engineers to understand that, in order for a train track to work, the distance between the rails MUST remain constant. Any time lines appear to defy the laws of physics by converging, as in the picture above, our eye/brain interprets this clue as distance in the picture. As a result, the picture above not only exhibits the 2D elements of height and width (defined by the borders of the picture), but also the missing third dimensional aspect of depth as provided by the converging lines of the train track.
Similar to the train tracks, the convergence of the sides of the highway (above) is perceived as depth and conveys a sense of great distance to Mt. Saint Helens in the background. For the viewer, it’s impossible to resist the sense of the third dimension and to be brought visually into the picture.
The convergence of lines in the picture above is subtler, but remains a very powerful cue for our eye/brain to perceive depth in the picture. The width of each step decreases as the eye travels up the stairway. Since this “can’t” be the reality, we interpret each smaller width as being farther away. In total, the stairway’s converging lines ad the element of three dimensions to the picture.
As you may have noticed, using converging lines as a photographic tool to instill a 3rd dimension also provides an added bonus. Our eyes will naturally follow converging lines into the scene. It’s irresistible. Managing converging lines will add the 3rd dimension and draw your viewer into the picture. How about that? A twofer.
In Part 3 of this series another of nature's visual cues, atmospheric perspective, will be discussed to understand its role in lending a sense of depth in photography.
Thursday, January 7, 2010


Monday, January 4, 2010
Creating A Sense Of Depth In Your Pictures - Part 1
The borders of our pictures automatically provide viewers with two dimensions – height and width. Creating a 3-dimensional world on a flat computer monitor or a photographic print is a bigger challenge for the beginning photographer. But it is a critical skill that photographers master to add realism and draw viewers into their pictures. To add the sense of depth to pictures, we’ll first consider how our eye/brain combination senses three dimensions in the real world. By applying these visual cues to our photography, we can instill the illusion of three dimensions in our pictures.
This series of blog entries will present several methods of introducing the 3rd dimension into our photographs.
What Our Eye/Brain Sees
One of the most important cues our eye/brain seeks out, in its search for an understanding of any scene, concerns focus. In photography we call the phenomenon “depth of field.” Our brain understands that when there are multiple objects in a scene, and they are all equally sharp, then they are probably located on or very close to the same plane.

Above is a simple flower picture. The main subject is obviously the large yellow dahlia. Notice that all the smaller flowers (pansies) surrounding the dahlia also appear sharp. To our mind, logic dictates that all of these flowers must be very close together (from front to back). Because everything is in focus at the same time, there is no obvious visual cue for our mind to place any degree of the third dimension to this picture. As a result, it looks flat and two-dimensional.
Experiencing the Third Dimension
Contrast the first picture with this version of the same scene below.

In this image the dahlia remains sharp, but the pansies are soft and out of focus. Our eye/brain thinks, “Ah, there MUST be distance (or depth) in this picture because there is a visual difference in the sharpness of the elements that make up the image.” We immediately attribute this difference in focus to be the result of their spatial locations in the real world, and we mentally experience the third dimension of depth.
Controlling Depth of Field
We create this 3D illusion when we take the picture. We visualize the final print BEFORE pressing the shutter release button. And, when using a camera with aperture controls, we intentionally select an f/stop that will render this "selective focus" effect.

Large aperture openings (smaller f/stop numbers) create increasingly shallower depth of field (more and more of the scene in front of and behind our focused subject is out of focus or blurred) and infuse that important sensation of three dimensions into our photographs.
Shown below are a series of photographs taken of the same subject to illustrate the impact of aperture size to the amount of the total image that is in focus. The camera's focus point in these pictures was the foreground bottle. Notice that as the f/stop number increases (and the aperture opening size decreases), the bottle in the background becomes increasingly sharper. Also notice how depth is emphasized by the out-of-focus background image, AND how your eye is drawn FIRST, like a magnet, to the sharpest object in each picture.


By learning to control depth of field, we – as photographers – infuse the third dimension into our imagery. Since our eyes are automatically drawn FIRST to objects that are in focus, we are also intentionally directing our viewers' eyes to the subject of our photograph.
But Wait a Minute...
I hear you asking, “Then what about landscape photographs were everything is in focus from foreground to background. How do I inject three dimensions into this 'totally in focus' picture?" That will be our next tip for creating the illusion of 3 dimensions.
This series of blog entries will present several methods of introducing the 3rd dimension into our photographs.
What Our Eye/Brain Sees
One of the most important cues our eye/brain seeks out, in its search for an understanding of any scene, concerns focus. In photography we call the phenomenon “depth of field.” Our brain understands that when there are multiple objects in a scene, and they are all equally sharp, then they are probably located on or very close to the same plane.

© 2008, Hub
Above is a simple flower picture. The main subject is obviously the large yellow dahlia. Notice that all the smaller flowers (pansies) surrounding the dahlia also appear sharp. To our mind, logic dictates that all of these flowers must be very close together (from front to back). Because everything is in focus at the same time, there is no obvious visual cue for our mind to place any degree of the third dimension to this picture. As a result, it looks flat and two-dimensional.
Experiencing the Third Dimension
Contrast the first picture with this version of the same scene below.

© 2008, Hub
In this image the dahlia remains sharp, but the pansies are soft and out of focus. Our eye/brain thinks, “Ah, there MUST be distance (or depth) in this picture because there is a visual difference in the sharpness of the elements that make up the image.” We immediately attribute this difference in focus to be the result of their spatial locations in the real world, and we mentally experience the third dimension of depth.
Controlling Depth of Field
We create this 3D illusion when we take the picture. We visualize the final print BEFORE pressing the shutter release button. And, when using a camera with aperture controls, we intentionally select an f/stop that will render this "selective focus" effect.

Large aperture openings (smaller f/stop numbers) create increasingly shallower depth of field (more and more of the scene in front of and behind our focused subject is out of focus or blurred) and infuse that important sensation of three dimensions into our photographs.
Shown below are a series of photographs taken of the same subject to illustrate the impact of aperture size to the amount of the total image that is in focus. The camera's focus point in these pictures was the foreground bottle. Notice that as the f/stop number increases (and the aperture opening size decreases), the bottle in the background becomes increasingly sharper. Also notice how depth is emphasized by the out-of-focus background image, AND how your eye is drawn FIRST, like a magnet, to the sharpest object in each picture.


(All pictures in this series were shot with a DSLR in Aperture Priority Mode. As the f/stop was manually changed to visually depict the effect of f/stop change on Depth of Field, the camera automatically selected the new, appropriate shutter speed.)
By learning to control depth of field, we – as photographers – infuse the third dimension into our imagery. Since our eyes are automatically drawn FIRST to objects that are in focus, we are also intentionally directing our viewers' eyes to the subject of our photograph.
But Wait a Minute...
I hear you asking, “Then what about landscape photographs were everything is in focus from foreground to background. How do I inject three dimensions into this 'totally in focus' picture?" That will be our next tip for creating the illusion of 3 dimensions.
Saturday, September 19, 2009
I Bought The Camera. What next?, Hub's Ideas
Possibly the second most frequently asked question by the beginning photographer (after "Which camera should I buy?") is, "What accessories should I purchase next?" There's no correct answer to this question. Much of a photographer's secondary equipment is determined by his/her photographic specialty, preferences and shooting style. However, that doesn't stop Hub from publishing a recommended "what next" list for those new to photography.
Some attempt has been made to prioritize this list, but undoubtedly there will be those who would shuffle the order -- or offer other suggestions. That's OK. This should get you started.
The list assumes you have this basic DSLR equipment: a camera with a built-in flash, lens and a data card.
- A "Dummy's" book for your camera. The camera manufacturer's manual is always my first source for answering questions about my camera. But I've found that buying an independent author's book about my camera usually facilitates learning. These books seem to be written in a more photographer-friendly style that complements the manufacturer's manual and are organized in the same way I'm accustomed to learning. A "how to" book for nearly every popular camera model seems to pop up in book stores and camera shops about the same time as the camera is released to the public. This type of book is an inexpensive learning tool when you're just getting started. Store this book in the next recommended item so it's always handy.
- Camera bag. You've got to have some safe place to put everything, and an easy way to lug it all around. Currently, at least in the Pacific Northwest, camera backpacks seem to be hot. I wasn't on the backpack band wagon until recently. I find they are convenient, comfortable, water resistant and do a good job of protecting your photographic investment.
- Tripod. A tripod comes in a close second to the camera bag. Although the thought of toting a tripod along may seem "geeky" or cumbersome, you'll soon learn to love this indispensable picture-taking platform for the sharpness it adds to your images and the time it gives you to compose your pictures. Lightweight and sturdy tripods are available to make carrying this accessory manageable.
- Cable release. This can be a fixed-wire cable release that screws into your camera's accessory socket or a wireless release that frees you to move farther away from your camera. Using a cable release when your camera is mounted on a tripod eliminates camera shake that's caused when you press the shutter release button.
- Extra battery. Don't miss that once-in-a-lifetime shot at 5:00 p.m. because you've been shooting since 6 a.m. Carry a spare battery (or two).
- Extra data cards. Ditto.
- Lens cleaning brush or "bulb" blower to remove dust safely from the front and rear element of your lens(es) as well as the mirror in your camera body. Your camera's glass surfaces are dust and dirt magnets.
- UV filter. Some will say that adding a filter to the front of your lens can be detrimental to the quality of your images. I prefer to play it safe with the front element of my lens and the coatings it contains by protecting it with a high quality UV filter (like Hoya or Tiffen). Accidental bumps and environmental contamination can result in real lens damage. A UV filter is much cheaper to replace. Any resulting degradation in quality will only be noticeable if you happen to own an electron microscope.
- Polarizing filter. This is definitely not critical, but I always seem to be pulling this filter out of my camera bag. I use a polarizing filter for its intended purpose -- to reduce glare from reflective surfaces, to create dramatic dark blue skies and, more routinely, as a neutral density filter when I intentionally want to reduce the amount of light entering the camera to achieve longer shutter speeds in daylight conditions. (Great for flowing motion images of our area's world-class collection of waterfalls.)
- Off-Camera Flash. When you get serious about improving your portrait, event and/or sports photography, an off-camera flash becomes necessary.
Don't think all these purchases have to be made immediately or at the same time. Cheap, bargain basement accessories can significantly impact image quality and hinder camera performance. (I can't tell you how many times I've seen a $20 tripod tip over with a $700+ camera attached.) Save up your money until you can afford to shop for high quality accessory items.
Friday, July 31, 2009
See Hub's Images They Way They Were Intended - In Print
I'm frequently asked if the images I use in my educational blogs and live classes can be purchased. I have resisted selling my images because I was concerned about affordability. I print all my images. Consequently each print is expensive, exacting and intended to meet the standards of a gallery print. As a result, the cost of prints might be out of reach for the readers I attempt to help in my digital photography blogs.
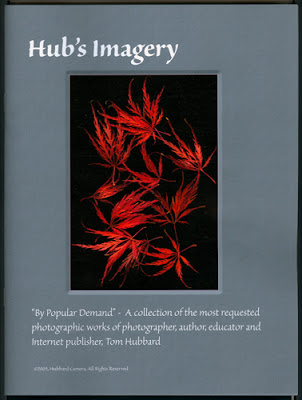
I recently discovered a solution that makes it possible to provide an economical way for students to see my images in a larger print form and also allow the modest collector a convenient way of purchasing fine art prints. The result is a professionally printed catalog, Hub's Imagery - By Popular Demand, containing enlarged versions of 21 of my most often requested and favorite images. The catalog cost less than $20. For those interested in owning any of my fine art images, the catalog also contains details for ordering individual prints on-line.
If you are interested in learning more, seeing a catalog preview or ordering the catalog, click here. I hope you will enjoy this series of images as much as I enjoyed putting the catalog together.
Wednesday, June 24, 2009
Converting a DSLR for Infrared Photography
Photography goes through phases. The straight documentary use of photography, for which it was originally intended, remains constant. Life requires documentation by both family photographers and professionals. All those billions of pictures become our personal and shared global history.
But there are processes and styles of photographic imagery that pass in and out of favor on a fairly regular basis. Black & white photography is a good example. It all began as black & white images when photography was first invented. Then color entered the scene and was popularized by the introduction of Kodachrome by Eastman Kodak in the 1930s. In the 1970s, black & white emerged once again in strong fashion, but eventually receded to a less respected position. Today, black and white is enjoying a well-deserved resurgence as photographers rediscover the medium. Software makes accurate color to black & white conversion possible, and the unique artistic qualities of black and white images are once again being appreciated.
Infrared photography has that same cyclic nature about it. But unlike black & white software conversion, digital images which have been converted to mimic infrared film have been a disappointment. The nature of real infrared film has been an elusive goal to digital photographers. Yet there is something about the delicacy and fragility of the fantasy-like pictures born of infrared photography that compels photographers to continue seeking a solution in the digital environment.
Using infrared film was a tricky proposition. Because the camera metering of infrared light was impossible, the results were never known until the film was processed. The only solution was bracket, bracket and more bracketing. Somewhere in that maze of bracketed images there had to be a printable negative. Then there was the dense red filter that was required to make the exposure. Reasonable depth of field required long exposures even on a bright sunny day.

Figure 1 - Infrared image using traditional infrared b&w film
©1974,tehubbard, all rights reserved
But, when successful, the results could be stunning. Shown in Figure 1 is a picture taken with Kodak infrared film during my "Infrared Period" in the mid 70s. Certainly, the style is not everyone's "cup of tea", but for many photographers, shooting with infrared film was an eye and mind opening experience.
For DSLR owners, several IR plug-ins have been available for programs like Photoshop and Lightroom for some time. These effects are applied to a normal digital image in post-processing. But none of these post-processing options have approached the true "look and feel" of a traditional infrared film image.
It has been possible for several years to modify DSLR cameras to record only the infrared portion of the spectrum. Problem solved? Well, yes and no. It's correct that the conversion allows true infrared photography, but the action also renders the camera useless for conventional photography. Only recently did I have a spare DSLR available to attempt this conversion. It was Advance Camera in Portland that afforded me the opportunity to request this surgical step. Having a local expert in IR conversions gave me the confidence to take the plunge.
Dave Sleeth at Advance Camera became my IR guru. The victim of my decision was my trusty old Canon Rebel camera (Figure 2).

Figure 2 - Canon Rebel DSLR for IR Conversion

©2009,tehubbard, all rights reserved
©2009,tehubbard, all rights reserved

©2009,tehubbard, all rights reserved
I decided to push the envelope and attempt to construct an HDR picture in a scene with an unusually high dynamic range. The picture below is composed of 3 exposures (each 2 stops apart) and produced as an HDR image using Photomatix Pro. It worked!

©2009,tehubbard, all rights reserved
Infrared photography is not for everyone, but for those who like to stretch the limits of photography and explore new creative techniques for expressing their art, IR photography presents a truly unique tool and a rare perspective on the world around us. But be sure to find your own guru to guide you through the conversion process. Better yet, I'll share my guru. Just give Dave a call. He services the cameras of photographers from around the world.
All in all, I am very pleased with my decision to convert my Rebel to IR. Thanks to Dave Sleeth and his crew at Advance Camera, I'm back in the 70s and enjoying every minute.
But there are processes and styles of photographic imagery that pass in and out of favor on a fairly regular basis. Black & white photography is a good example. It all began as black & white images when photography was first invented. Then color entered the scene and was popularized by the introduction of Kodachrome by Eastman Kodak in the 1930s. In the 1970s, black & white emerged once again in strong fashion, but eventually receded to a less respected position. Today, black and white is enjoying a well-deserved resurgence as photographers rediscover the medium. Software makes accurate color to black & white conversion possible, and the unique artistic qualities of black and white images are once again being appreciated.
Infrared photography has that same cyclic nature about it. But unlike black & white software conversion, digital images which have been converted to mimic infrared film have been a disappointment. The nature of real infrared film has been an elusive goal to digital photographers. Yet there is something about the delicacy and fragility of the fantasy-like pictures born of infrared photography that compels photographers to continue seeking a solution in the digital environment.
Using infrared film was a tricky proposition. Because the camera metering of infrared light was impossible, the results were never known until the film was processed. The only solution was bracket, bracket and more bracketing. Somewhere in that maze of bracketed images there had to be a printable negative. Then there was the dense red filter that was required to make the exposure. Reasonable depth of field required long exposures even on a bright sunny day.

Figure 1 - Infrared image using traditional infrared b&w film
©1974,tehubbard, all rights reserved
But, when successful, the results could be stunning. Shown in Figure 1 is a picture taken with Kodak infrared film during my "Infrared Period" in the mid 70s. Certainly, the style is not everyone's "cup of tea", but for many photographers, shooting with infrared film was an eye and mind opening experience.
For DSLR owners, several IR plug-ins have been available for programs like Photoshop and Lightroom for some time. These effects are applied to a normal digital image in post-processing. But none of these post-processing options have approached the true "look and feel" of a traditional infrared film image.
It has been possible for several years to modify DSLR cameras to record only the infrared portion of the spectrum. Problem solved? Well, yes and no. It's correct that the conversion allows true infrared photography, but the action also renders the camera useless for conventional photography. Only recently did I have a spare DSLR available to attempt this conversion. It was Advance Camera in Portland that afforded me the opportunity to request this surgical step. Having a local expert in IR conversions gave me the confidence to take the plunge.
Dave Sleeth at Advance Camera became my IR guru. The victim of my decision was my trusty old Canon Rebel camera (Figure 2).

Figure 2 - Canon Rebel DSLR for IR Conversion
Dave began by giving me all the necessary warnings:
- the camera will no longer be usable for flash photography
- the metering system will no longer be perfect
- since all lenses focus IR differently, the photographer will need to use the diaphragm (depth of field) to assist in focus control.
But most of these concerns are offset by the fact that the image can be seen immediately on the camera's preview LCD and adjustments can be made on the spot. And flash photography was not one of my requirements.
Customers can select the level of IR they want to enter the camera by specifying which IR filter to install (resulting in images with some color to pure black & white). I selected the 800nm filter. This filter produces a very black and white image. The same look as the film I am trying to mimic.
The cost of the conversion is $245 regardless of the IR filter selected. At the same time, the camera is given a thorough cleaning and check up. The camera is also checked with a variety of lenses to check IR focus. The whole process takes only a few days.
I have to say that the results have been amazing. I am able to produce images that are very similar to traditional infrared film. I've also discovered some other pluses with this conversion:
- the results are immediately reviewable on the camera's LCD
- all my lenses are "tack sharp" -- no focus problems have been encountered
- the histogram still provides all the gamut information I want
- the absence of a dense red filter makes hand-held exposures at smaller aperture settings possible
- I return from shooting sessions knowing that the picture I wanted is on my data card.
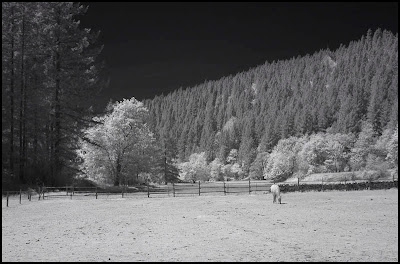
Here are a few of the first shots taken with the IR converted Canon Rebel camera:

©2009,tehubbard, all rights reserved

©2009,tehubbard, all rights reserved

©2009,tehubbard, all rights reserved
I decided to push the envelope and attempt to construct an HDR picture in a scene with an unusually high dynamic range. The picture below is composed of 3 exposures (each 2 stops apart) and produced as an HDR image using Photomatix Pro. It worked!

©2009,tehubbard, all rights reserved
Infrared photography is not for everyone, but for those who like to stretch the limits of photography and explore new creative techniques for expressing their art, IR photography presents a truly unique tool and a rare perspective on the world around us. But be sure to find your own guru to guide you through the conversion process. Better yet, I'll share my guru. Just give Dave a call. He services the cameras of photographers from around the world.
All in all, I am very pleased with my decision to convert my Rebel to IR. Thanks to Dave Sleeth and his crew at Advance Camera, I'm back in the 70s and enjoying every minute.
Subscribe to:
Posts (Atom)