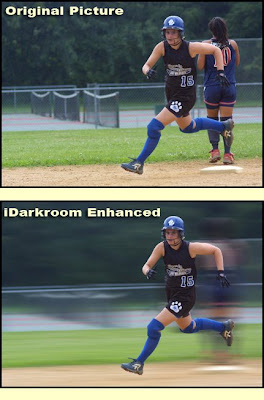
 The blurred background effect of the second picture was created using a combination of two Photoshop features: masking and the motion blur filter.
I use Adobe's Photoshop CS3 as my primary image editing program. The market offers a wide variety of imaging software with prices for every budget. I started with Photoshop, so I feel most comfortable with this software.
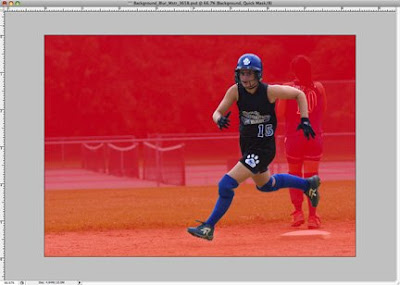
My first task was to isolate the runner from the background. This was done by creating a "mask". A mask defines the outline of the object(s) to be isolated. In Photoshop, several options are available for creating a mask. In this case, I used the "lasso" tool to outline the body of this runner:

The picture of my computer monitor above shows the isolated softball runner against the background (the area shaded in RED). To complete the motion blur effect, I used the following steps:
- With the runner "selected" (runner is surrounded by the marching marquee), I copied her image using Edit/Copy.
- The copy is then pasted into a new layer. (Now I have two layers. The background layer contains the ENTIRE original image. The second layer contains ONLY the runner.) In Photoshop when you perform an Edit/Copy and immediately perform an Edit/Paste the object is pasted into a new layer and overlaid into EXACTLY the same position as the original.
- I selected the background layer.
- Going to the "Filter" menu, I chose the Blur/Motion Blur Option. Because I selected the background layer the Motion Blur effect will only modify the background scene.
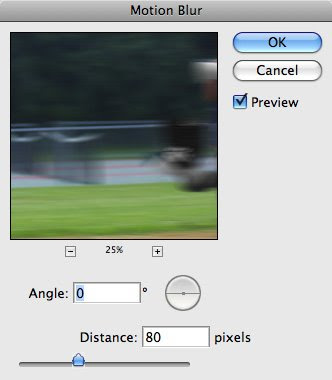
- In the Motion Blur window (below), I set the angle to zero degrees to ensure the effect would be parallel to the ground and the blur "distance" was set to 80. Click OK and the effect was completed:

If you check the "Preview" box (above), the effect of the "Distance" slider can be seen on the full computer image. Experiment by moving the slider until you find the amount of background blur that looks best for your image. It's easy to overdo digital effects and lose the photographic "look and feel". So less is generally best.
Because the isolated image of the runner is on a dedicated layer in FRONT of the background layer, her image remains sharp while everything behind her shows motion blur.
If you have questions or comments, let me know. You know where to find me.


1 comment:
Great tips. Thanks for sharing.
Post a Comment